
Whether you’re learning in person or remotely, have fun and stay connected with Zoom in the classroom.
If you’re a parent supporting a young learner, or a student looking to succeed in your digital classroom, read on for tips and guidance on how to get started with Zoom.

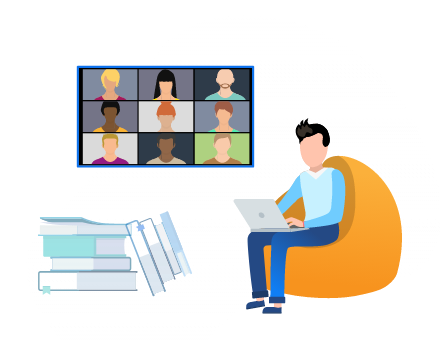
No matter how far you are from the classroom, you can still learn and thrive using Zoom to connect with teachers and friends. Setting up Zoom takes a few minutes, and you will be able to access your class sessions after you follow these quick steps.
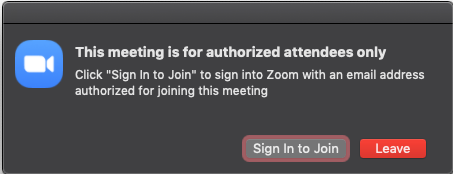
You will use your school email address to join Zoom classes under a process known as external authentication. Follow these steps to join a Zoom meeting using external authentication.
Take full advantage of Zoom by downloading the Zoom desktop app. You can join meetings from the app without having a Zoom account.
If you’re using a Chromebook for class, download Zoom’s progressive web application (PWA) for Chrome OS to improve your experience.
There are many ways to join Zoom class sessions, including your school’s LMS, Zoom desktop client, Zoom web portal, email, or your calendar. Regardless of how you join, we want to make it easy, so follow the simple steps below.

Even if you’ve used Zoom for video calling, you might not be familiar with all the features available for learning and collaboration! Get to know these features you may be using in your class sessions.
If your teacher has enabled annotation, you can draw, type, or stamp on a shared screen or whiteboard as part of the lesson. Click View Options at the top of the screen, then choose Annotate, which will open up the toolbar. Follow your teacher’s directions for using the annotation tools with the lesson.
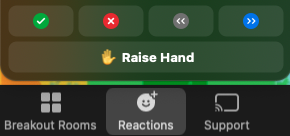
Breakout Rooms are a fun way to meet in smaller groups separate from the main Zoom session. Sometimes, you may be assigned to join a specific Breakout Room, and other times, you may be able to select which Breakout Room to join. If your teacher allows you to self-select a room, click the Breakout Rooms icon at the bottom of your screen and select from a list of open rooms. Your teacher may send directions to your room or enter the room at any time to check on your group.
Follow your teacher’s directions when using the in-meeting chat panel. Your teacher may ask you to type questions or share ideas in the chat, or you may be able to send a message directly to the teacher if you need to share something private. Remember to be respectful of your classmates while chatting, and follow any classroom rules!
Click the Reactions icon at the bottom of your screen to use nonverbal feedback, which will allow you to communicate with your teacher without disrupting the class. You can raise your hand, indicate “yes” or “no” by using the checkmark or X icon, and even ask your teacher to speed up or slow down their lesson using the forward or back arrows.
Nonverbal feedback is persistent, meaning the icon will appear on your video until your teacher clears it. If you selected an icon by accident and want to remove it, simply select it again.
Your teacher may use polls for virtual pop quizzes, trivia games, status checks, and other interactive lessons. When a poll is launched, it will pop up in a separate window from the Zoom session — all you need to do is select your responses. Your teacher will be able to see the individual responses of everyone in the class.
If Reactions are enabled in your classroom, you can use them to express yourself without saying a word! Choose an emoji reaction to pop up on your video panel to show your excitement, cheer on a classmate, or show love for a topic. You can even choose your reaction skin tone.

Your teacher may allow you to share your screen as part of the lesson. All you have to do is click the Share Screen icon in your meeting controls, then choose to share a specific window or your entire desktop (your teacher may have specific instructions for what they want you to share with the class). Note that your teacher can enable or disable screen sharing during a class, so you may not always have this option available, or you may have to request permission.
Virtual backgrounds can be used for fun, but they might also help you feel more comfortable turning on your camera by masking your real background. Your school may have branded backgrounds with their logo, mascot, and colors, or your teacher might ask you to choose a themed background based on the lesson. To change your virtual background, just click the arrow next to your Start/Stop Video icon at the bottom of the screen and select Choose Virtual Background.

You can take advantage of Zoom’s accessibility features to meet your individual needs and make the most out of every Zoom session. Here’s how we make Zoom accessible for students with different needs:
Use keyboard shortcuts to easily navigate our features with just your keyboard.
We follow the latest accessibility standards to help make Zoom accessible to the latest screen readers. You can also use screen reader alerts to play custom notifications for specific actions.
Zoom’s Live Transcription feature automatically provides captions, or schools can use a third-party closed captioning service. You can also anonymously request to enable Live Transcription in a class or meeting.
Use multi-pinning to customize your view — this allows you to pin an instructor and sign language interpreter, for example.
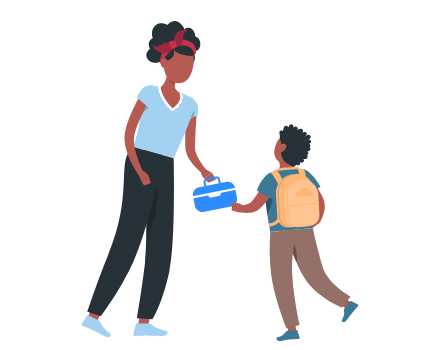
You want your student to have the best educational experience possible, whether they’re learning in an in-person, remote, or hybrid environment. Here are a few ways you can help set up your student for learning successfully with Zoom.
If you have internet at home, here are a few ways you can help improve your connection so your student can access Zoom.
If possible, help your student set up a learning space where they will join their Zoom class every day. This can be in their room, in the kitchen, living room, or anywhere else in the house.
Check out our blog from the International Society for Technology in Education (ISTE) for more tips on how to support your student with virtual learning.
Zoom is committed to safeguarding the privacy and security of our users’ data, including the data of K-12 students.
Our Children's Educational Privacy Statement describes the personal data we collect, use or disclose from students under the age of 18 when they receive educational services through Zoom’s product.
We are compliant with the US Children's Online Privacy Protection Act (COPPA). We also support compliance of our US customers in the K-12 and postsecondary education sectors with the Family Educational Rights and Privacy Act (FERPA).
Zoom comes with numerous security features designed to manage virtual classrooms, prevent disruption, and help educators effectively teach remotely.
To learn more about Zoom’s security features, please see our list of tips and tools to prevent and respond to meeting disruptions.
Visit the Zoom Blog for product updates, how-tos, and helpful resources for using Zoom in the classroom and beyond.